Every time I need to create something with the famous atmega328p (the chip on every arduino), I’m doing those follow steps I decided to share.
Let’s start
To prepare a board for a generic atmega328 project, we need:
- atmega328
- a board
- 16 MHz clock crystal
- 2 22 pF capacitors

This could seems a very minimal installation but the atmega328 could also run without an external oscillator, but it’s really better to have one (we avoid a lot of issues while programming and debugging). I’ll show you some project that doesn’t need the crystal in next article.
Capacitors are not mandatory neither (with crystal, without crystal there’s not need at all for them) but better to follow specifications. I’ve some project running without them but only the crystal without any issues.
Ok… The pins we are going to wire the oscillator are the 9 and 10, while caps are between GND (pin 8) and above pins. Pretty easy no?
I’m using the common usbasp programmer to talk with the atmega, you can find it on ebay for 4$ (or less).
Beginning to play is easy as wiring our usbasp programmer to the chip. The pinout for wiring is easy to found on the web, my usbasp as the ISP10 pin socket so let’s prepare the female part for convenience on our board with the information we found:
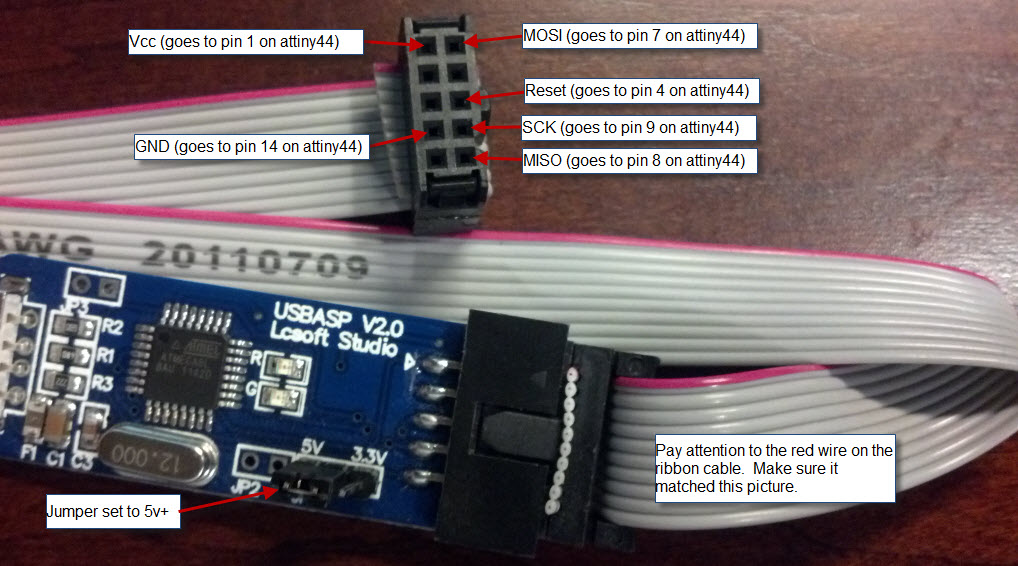
Looking at atmega pinmapping we easily found how to connect the ISP header to our atmega:

Program atmega328 using usbasp programmer
We are going to use the Arduino IDE to talk with t he chip, to achieve that we need to explain the IDE how to use the usbasp instead of using the default arduino programmer.
In order to do this, open Arduino IDE and select USBasp in Tools > Programmer menu. If it’s not present, you need to add follow lines in programmers.txt in your sketchbook/hardware folder (close Arduino IDE before doing this):
usbasp.name=USBaspusbasp.communication=usbusbasp.protocol=usbaspLet’s test our setup with the blink sketch (File > Example > Basic > Blink) uploading the code through the usbasp programmer (File > Upload with programmer) or pressing Shift and click on Upload icon! Do not forget to add a led on correct pin:

After upload you should see the led blink once a second.